유투브에 올린 동영상을 페이지, 글, 또는 사이드바에 미리보기 이미지와 함께 출력해 줍니다.
플러그인 다운로드: https://wordpress.org/plugins/youtube-channel-gallery/
제 사이트에서 사용중인 예:

사용법:
1. 플러그인을 설치합니다.
2. 관리자 페이지의 외모 > 위젯에서 사이드바에 추가 또는 페이지나 글에 위젯으로 추가합니다.
3. Youtube Channel Gallery 위젯 추가시 옵션 항목을 입력 또는 선택합니다.
단축코드를 직접 입력할 수도 있습니다.
단축 코드의 예:
[Youtube_Channel_Gallery feed="user" user="MaxonC4D" feedorder="desc" videowidth="500" ratio="16x9" theme="light" color="white" quality="small" autoplay="1" rel="1" showinfo="1" maxitems="9" thumbwidth="90" thumbratio="16x9" thumbcolumns="3" title="1" description="1" thumbnail_alignment="left" descriptionwordsnumber="10" link_window="0"]
Demo:
아래 링크에서 사용된 예를 볼 수 있습니다.:
- Widget Demo | ES
- Demo only with thumbnails | ES
- Demo with title and description and thumbnail at top | ES
- Demo with title and thumbnail at top | Demo with title and thumbnail at top
- Demo with title and description and thumbnail on the left | ES
- Demo with title and thumbnail at bottom | ES
- Demo with playlist | ES
그누보드와 워드프레스 이름을 따라 그누프레스라 이름 지은 거 같습니다.
사이트에 적용한 예: http://hdvr.org/wp/gnu01
필요하신 분들은 아래 링크에서 다운 받으세요. ^^
http://sir.co.kr/main/gnupress/ ]]>
필요해서 혹시나 검색해 보았더니 딱 맞는 플러그인이 있네요..^^
플러그인 다운로드: https://wordpress.org/plugins/hide-this/
사용의 예)
]]>

워드프레스에서 글쓰는 형식별로 코멘트 허가 여부를 설정하는 플러그인입니다.
제 경우 사이트에 목록으로 구현하고 있는 페이지에는 코멘트 필드가 나타나지 않도록 하기위해 사용하고 있습니다.
제 사이트 적용예:
http://hdvr.org/wp/instagram
http://hdvr.org/wp/gnu01
플러그인 다운로드:
https://wordpress.org/plugins/disable-comments/
사용법:
플러그인을 설치한 후 활성화 합니다.
설정은 싱글 사이트인 경우 관리자 페이지의 설정 메뉴에서, 멀티 사이트인 경우에는 네트워크 관리자 페이지의
설정 메뉴에서 코멘트 허가 여부를 설정하면 됩니다.
Theme Compatibility
bbPress 2.x has built-in theme support. All required elements such as front-end editing are included. This means that all functionality will work, even when a theme has no specific bbPress templates or code included with it.
All bbPress compat can be overridden using a theme or another plugin. Check bbp-theme-compat template wrappers for what a normal theme should include.
To customize bbPress:
The directory “wp-content/plugins/bbpress/templates/default/” contains the directories “bbpress”, “css”, “extras”, and “js”, and the file “bbpress-functions.php”.
- The “bbpress” directory contains template parts. Copy any of them into a directory named “bbpress” in your themes root, so it looks like: /wp-content/themes/%your-theme%/bbpress/
- The “extras” directory contains optional root level page templates, to make life a little easier when customizing; copy any you want to use or modify into the root of your theme. eg. /wp-content/themes/%your-theme%/
- The “css” directory contains style sheets that work with the default markup. Copy any you want to modify into a directory named “css” in your theme’s root. eg. /wp-content/themes/%your-theme%/css/
- Basically, you could copy the entire ‘bbpress’ and ‘css’ directories out of bbPress’s default template directory, and into your theme, and bbPress will use the ones located inside your theme instead. Pretty neat, eh?
1. bbpress의 templates/default 폴더에 있는 bbpress 폴더를 사용하고 있는 테마의 루트 디렉토리에 복사해서 붙여 넣는다.
(/wp-content/themes/your-theme/bbpress)
2. bbpress의 templates/default 폴더에 있는 extras 폴더를 사용하고 있는 테마의 루트 디렉토리에 복사해서 붙여 넣는다.
(/wp-content/themes/your-theme/extras)
3. bbpress의 templates/defaul/css 폴더에 있는 css 파일들을 사용하고 있는 테마의 css 폴더에 카피해서 붙여 넣는다.
(/wp-content/themes/your-theme/css)
웹기반 지도: http://map.vworld.kr/map/maps.do
데스크탑용 지도 다운로드: http://desk.vworld.kr/desktop/dh_main.do
설명:
구글 어스에 비하면 퍼포먼스와 시스템 리소스 사용율 등 여러부분에서 취약한 점이 있지만 국내 지역을 3D로
볼 수 있다는 점이 강점입니다. 국내 구글 어스 사용자들이 3D 건축물들을 구글어스에 전 지역을 커버할 만큼
업로드 하기 전까지는 브이월드가 3D 지도의 대안이 될거 같습니다.
아쉬운 점은 지도를 컨트롤할 수 있는 옵션이 구글 어스보다 미흡하여 지도에서 3D 이미지를 저장하여 360°
파노라마 VR을 만들기 힘들다는 점입니다.
국토교통부는 브이월드의 사용권을 국내 업체들에게 공개할 예정이랍니다.
국내 지도기반 사업을 하는 업체들이 잘 활용하여 좀더 발전된 서비스를 할 수 있었으면 합니다.
<kml>
<Response>
<name>London</name>
<Status>
<code>200</code>
<request>geocode</request>
</Status>
<Placemark id=”p1″>
<address>London, Greater London, UK</address>
<AddressDetails Accuracy=”4″>
<Country>
<CountryNameCode>GB</CountryNameCode>
<AdministrativeArea>
<AdministrativeAreaName>England</AdministrativeAreaName>
<SubAdministrativeArea>
<SubAdministrativeAreaName>Greater London</SubAdministrativeAreaName>
<Locality>
<LocalityName>London</LocalityName>
</Locality>
</SubAdministrativeArea>
</AdministrativeArea>
</Country>
</AddressDetails>
<Point>
<coordinates>0.126236,51.500152,0</coordinates>
</Point>
</Placemark>
</Response>
</kml>
As you can see, I’ve done a search for London. It’s presented the response code from the server (200 – found and valid), the address, how likely it is that this is the place I’ve queried (AddressDetails Accuracy), the country name code, and most importantly, the longitude and latitude values.
Just as a quick aside, if you want to view this yourself, you can do so with one of the URL strings below, but you’ll need to sign up for a Google Maps API key. Now, on with the guide… http://maps.google.co.uk/maps?
The Google Map URL. If you didn’t know that bit, you’re shouldn’t be reading this. Moron.
예) http://maps.google.com/maps?q=seoul&t=k&output=embed
f=q
This sets what kind of display the user is presented with. Can be set to q (the standard layout), d (for directions) or l (for local). Defaults to q.
q=location+goes+here
The query string. Words are separated by + signs. You can enter an address, a town, city or village, postcodes, variables of latitude and longitude (in either decimal form or as degrees, minutes and seconds) and landmarks.
Everything from here on in is preceded by an & sign, as it’s tagged on to the end. Again (if you have no girlfriend), things get interesting…
near=
Used to specify the location instead of putting it into q. Also has the added effect of allowing you to increase the AddressDetails Accuracy value by being more precise. Mostly only useful if q is a business or suchlike.
z=
Zoom level. Can be set 19 normally, but in certain cases can go up to 23. More information on the super-high zoom level images can be found here.
spn=
Sets the span width and height that the geocoder will compute. Basically, it limits the number of degrees long/lat that will be shown.
sspn=
Sets the boundaries for the search span. Used for local searches, near as I can tell.
mrt=
Specifies the type of search (left blank by default, which searches everything). Can be set to:
- all – all results
- loc – locations based. Requires q to be filled.
- yp – the business search. Also requires q to be set, and works better with loc as well.
- kmlkmz – searches the community maps. Requires a location set either in q, loc or near.
- websearch – searches webpages that Google has given a geographical position.
- realestate – gives real estate based results. Obviously.
ll=
Latitude and longitude of the map centre point. Must be in that order. Requires decimal format. Interestingly, you can use this without q, in which case it doesn’t show a marker.
sll=
Similar to ll, only this sets the lat/long of the centre point for a business search. Requires the same input criteria as ll.
t=
Sets the kind of map shown. Can be set to:
- m – normal map
- k – satellite
- h – hybrid
- p – terrain
Don’t ask me why those letters were used, I don’t know why either.
layer=
Turns overlays on and off. Can be set to t for traffic or c for street view, or tc for both at the same time.
view=
Controls the view type. Set to text for text, or map for map.
saddr=
Sets the starting point for directions searches. You can also add text into this in brackets to bold it in the directions sidebar.
daddr=
Sets the end point for directions searches, and again will bold any text added in brackets.You can also add “+to:” which will set via points. These can be added multiple times.
mrad=
Allows you to add additional destination addresses. Just as a quick aside, you can use saddr=, daddr= and mrad= instead of “+to:” if you want.
dirflg=
This controls the route that will be planned. Can be set to h for no motorways, r for public transport only or w for walking directions.
via=
Allows you to insert via points in directions. Must be in CSV format. For example, via=1,5 addresses 1 and 5 will be via points without entries in the sidebar. The start point (which is set as 0), and 2, 3 and 4 will all show full addresses.
doflg=
Changes the units used to measure distance (will default to the standard unit in country of origin). Change to ptk for metric or ptm for imperial.
cbll=
The latitude and longitude values for Street View.
cbp=
Alters the Street View window. Controls (in order) window size, bearing, tilt, zoom and pitch.
start=
Skips the first match for search
num=
Controls how many matches are displayed. Will accept values up to 10.
om=
Set to 1 to open the overview map, or anything else to close it.
ie=
Sets the input character encoding, e.g., ie=UTF8.
oe=
Sets the output character encoding, e.g., ie=UTF8.
output=
Sets the output format. Can be set to:
- html – standard
- js – gives you object literals and function calls
- kml – an XML file like the one from the start
- nl – XML formatted NetworkLink wrapper, which links to a URL for information to be used with Google Earth and Google Maps
- embed – for embedding maps into other sites (also note that this requires the s= param which is obfuscated)
- dragdir – outputs a JSON object containing the reverse geocode and an encoded polyline for a given route
f=
Controls the form style. Can be set to d for the directions form, l for the local version, or q for the normal one.
latlng=
Not sure. Inputs as 3 figures in CVS format, but only uses the last one. Seems to have something to do with business locations. Must be used with valid data for other operators. Also, must have q=. Outputs a teeny map.
cid=
Same as latlng, but allows you to specify map size.
geocode=
Geocoding service for embedded maps.
Iwloc=
Does funky things with the info window. Can be set to:
- A-J – opens the info window over a business marker
- near – puts it over the green arrow (when shown)
- addr – places it over a set address (the default value)
- start, end and pausex – for use in driving directions, where x is the number of the point in question
iwd=
Sets the info window to expanded view when set to 1.
iwstate1=
Puts the infowindow into various edit modes. Can be set to:
- sscorrectthiscard – standard edit mode
- sscorrectthiscard:ssmovemarkercard – for marker position edits
- sscorrectthiscard:ssedithistorycard – allows you to view a marker’s history
pw=
Sets print mode.
msa=
Does stuff with My Maps. Set to 0 show defined My Maps, b to turn the My Maps sidebar on, 1 to show the My Maps tab on its own, or 2 to go to the new My Map creator form.
msid=
Specifies My Maps identifiers. Use it with ms and msa=0 to show particular My Maps.
vp=
Activates Copyright Service mode. Returns information about the copyright ownership in Javascript format. Only works when the spn= and z= are set. Can also include t for map type and key for setting an API key.
hl=
Controls the language. Can be set to:
- eu = Basque
- ca = Catalan
- hr = Croatian
- cs = Czech
- da = Danish
- nl = Dutch
- en = English
- fi = Finnish
- fr = French
- de = German
- gl = Galacian
- el = Greek
- hi = Hindi
- id = Indonesian
- it = Italian
- ja = Japanese
- no = Norwegian
- nn = Nyorsk
- pt = Portuguese
- rm = Raeto-Romance
- ru = Russian
- sr = Serbian
- sk = Slovak
- sl = Slovenian
- es = Spanish
- sv = Swedish
- th = Thai
- tr = Turkish
- uk = Ukrainian
- vi = Vietnamese참고: http://stackoverflow.com/questions/2660201/what-parameters-should-i-use-in-a-google-maps-url-to-go-to-a-lat-lon
재미있는 곳 몇군데를 파노라마로 담아보았습니다. 파노라마 VR을 만드는 방법은 현실에서 카메라로 촬영한 후 편집해서
만드는 방법과 동일합니다. 차이점이 있다면 사진을 구글어스에서 찍는(저장) 것입니다.^^
아래 파노라마 VR은 구글어스에서 이미지를 저장해서 만든 것입니다. 사진 밑의 GPS데이터를 복사해서 구글어스나
구글지도의 검색창에 붙여넣어 검색하면 해당위치의 위성사진을 볼 수 있습니다.
구글어스로 파노라마 VR 만들기
구글어스로 파노라마 VR을 만들려면 원하는 위치에서 구글어스를 회전해가며 필요한 사진들을 저장해야 합니다.
구글어스를 컨트롤 할 수 있는 키보드의 방향키와 컨트롤키로 일정각도로 회전해가며 이미지를 순서대로 저장합니다.
구글어스를 컨트롤하는게 익숙치 않다면 파노라마용 kml좌표값을 생성해주는 아래 제너레이터를 사용하면 편합니다.
파노라마 VR 제작용 구글어스 kml파일 다운받기:
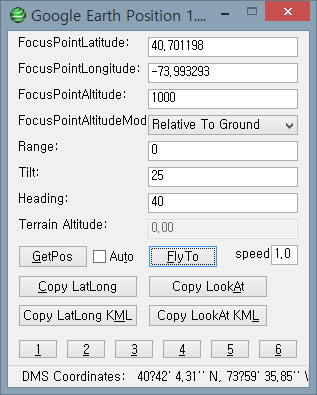
손맛(?)을 느끼면서 자기만의 촬영 노하우로 촬영(저장)하려면 GoogleEarthPosition 이라는 유틸리티를 사용하세요. 원하는 위치에서 원하는 각도대로 위치를 이동시켜 이미지를 저장할 수 있습니다. Range 값을 0보다 크게하면 오브젝트 VR용 소스 이미지도 저장할 수 있습니다.
GoogleEarthPosition 다운로드:
좌표값을 입력하여 구글어스의 위치를 이동할 수 있는 구글어스용 유틸리티입니다.
구글어스로 파노라마용 소스 이미지를 저장하거나 오브젝트용 소스 이미지를 저장할 때 유용합니다.
구글 지도를 연 후 원하는 위치를 클릭하면 좌측 상단에 GPS 데이터가 나타납니다.
1. 구글지도로 파노라마 VR을 만들고 싶은 GPS 좌표값을 알아낸 후 위 Goolge 파노라마 KML 생성기에 입력해서
파노라마 제작용 kml 파일을 다운받습니다.
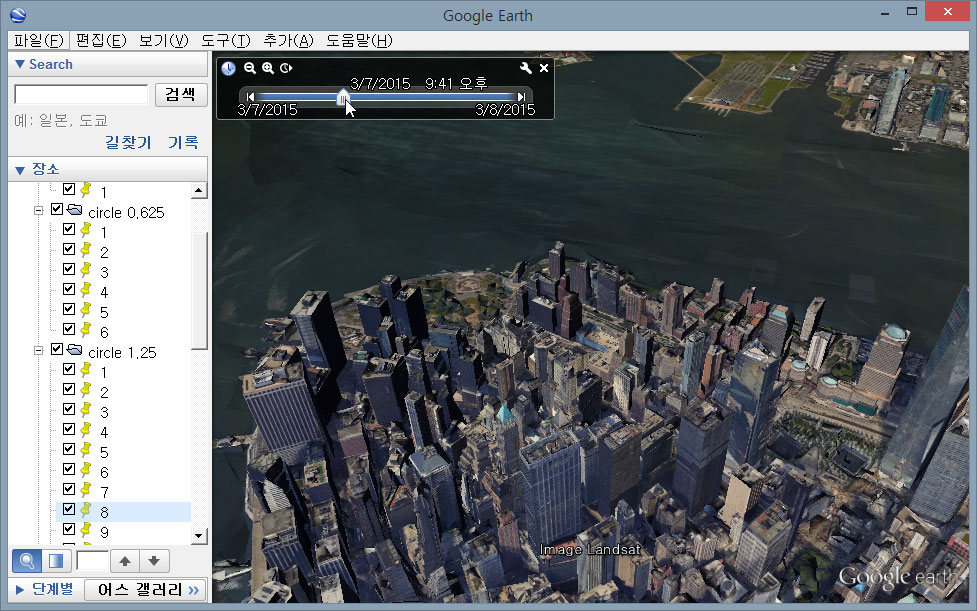
2. 다운받은 pano.kml 파일을 더블클릭해서 구글어스로 불러옵니다. 구글어스는 이곳에서 다운받아 설치할 수 있습니다.
3. 구글어스의 좌측 패널에 나타난 좌표값을 하나씩 더블클릭해서 위치를 이동시킨 후 해당 이미지를 순서대로
저장합니다. 구글어스의 메뉴의 파일 > 저장 > 이미지 저장(단축키: Ctrl + Alt + S)
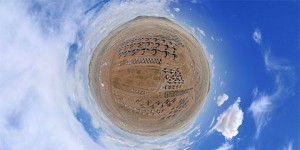
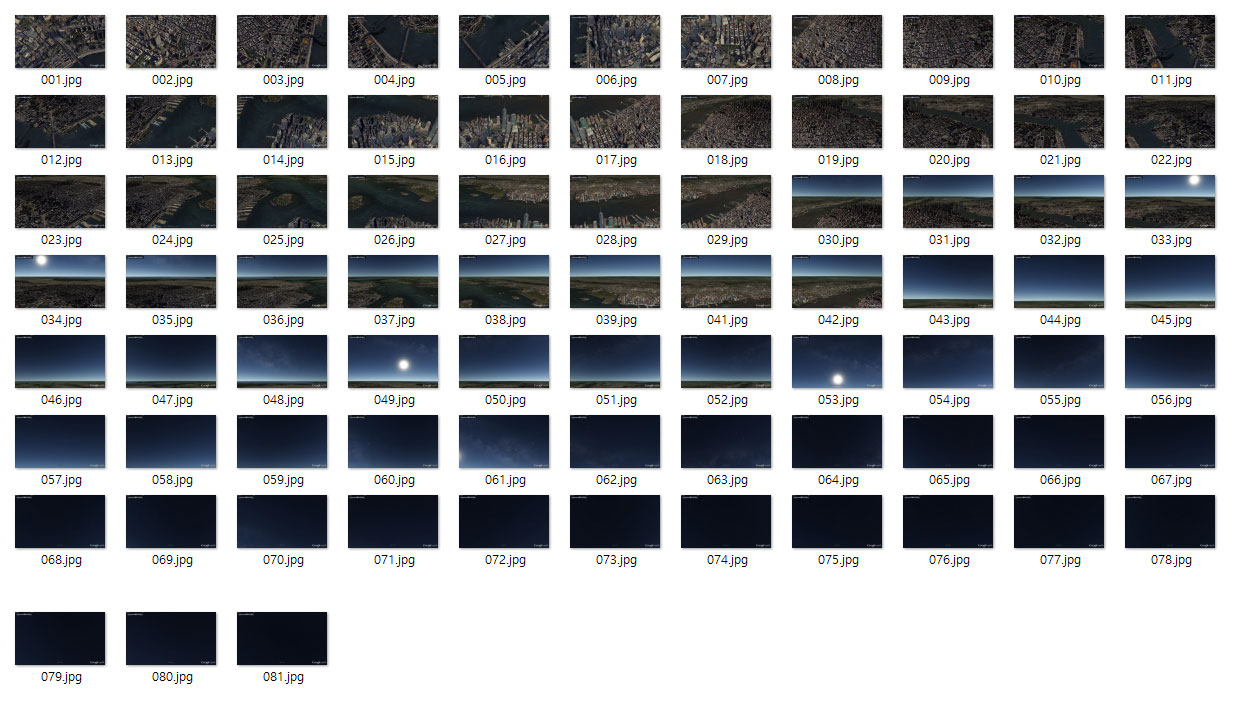
4. 다음과 같이 저장한 이미지를 PTGui나 Autodesk Sticher로 이어붙여 스피어리컬 파노라마 이미지로 렌더링 합니다.
5. 렌더링한 파노라마 이미지를 krpano 뷰어로 구성하여 웹에 포스팅합니다(마우스로 드래그 해보세요).
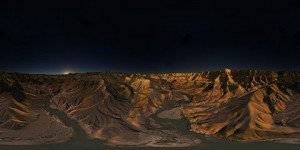
데이비스-몽선 에어 포스 베이스:
미국 85707 Arizona, Tucson, S Craycroft Rd
32.149790, -110.833189
구글 지도에서의 위치(마우스로 드래그 해보세요):
구글지도에서 수중 파노라마 VR도 볼 수 있습니다(마우스로 드래그 해보세요).
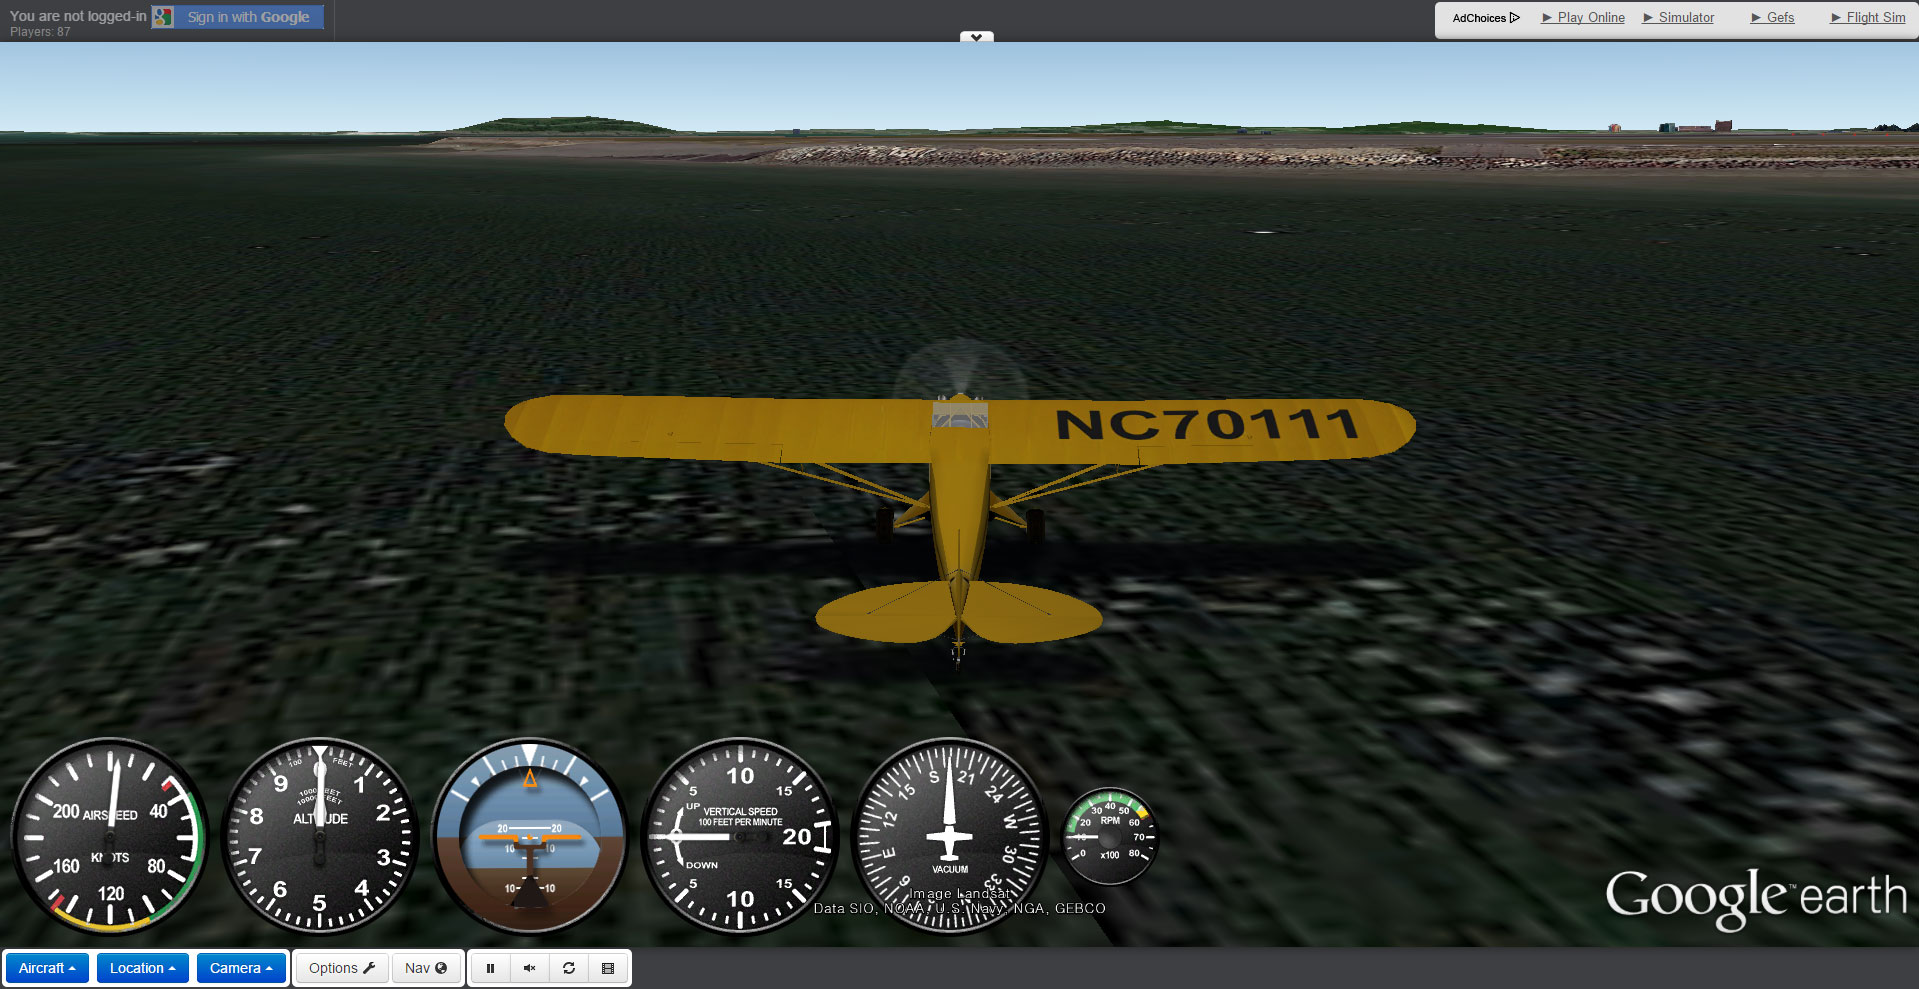
구글어스 웹 플러그인으로 게임도 할 수있네요. ^^
구글 크롬브라우져에 구글어스 플러그인을 설치하고 비행기 플라잉 시뮬레이션 게임을 해보세요.
비행 시뮬레이션 게임 해보기